Submit Model
‘How can I submit a Morpheus model?’
All Morpheus models including their complete version history are stored in a Git repository: gitlab.com/morpheus.lab/model-repo (from this Git repository all model pages you can find on this website are automatically generated).
Model Submission via GitLab
Models can be submitted in eight simple steps. The complete model upload procedure is shown in this short video:
Below you’ll find a more detailed, illustrated walkthrough explaining each step.
Step-by-step Guide
- Prepare a valid and running XML model file including meaningful title and description, e.g. using your local Morpheus GUI.
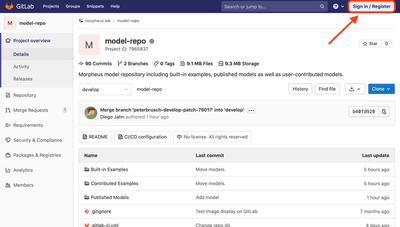
- A (free) user account at GitLab.com is needed (which hosts Morpheus' open source repository). You can also sign in using an existing GitHub/Google/Twitter account. This account will also allow you later to track and modify your model. You need to be logged in at GitLab via the ‘Sign in / Register’ button on the top right to proceed to the next step.
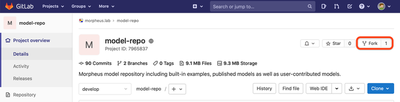
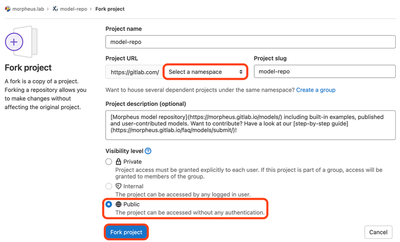
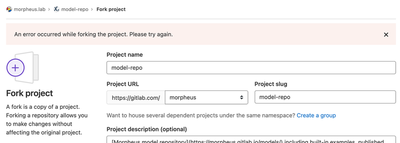
- Now fork the repo, i.e. save a copy of the repository under your GitLab user account, by clicking on ‘Fork’ at gitlab.com/morpheus.lab/model-repo. On the next page ‘Select a name space’, which is usually your name and set the visibility level to ‘Public’. Finish by clicking on ‘Fork project’.
If you have previously submitted a model but there is no longer one in the review process, please delete your fork first and create a new one so that your copy of the repo is up to date. Otherwise you will get this error message:
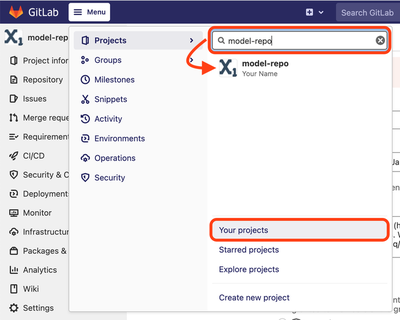
To remove your old fork, click on ‘Menu’ at the top. Now either use the search to find your old ‘model-repo’ fork or go to ‘Your projects’ and select the fork from the list there.
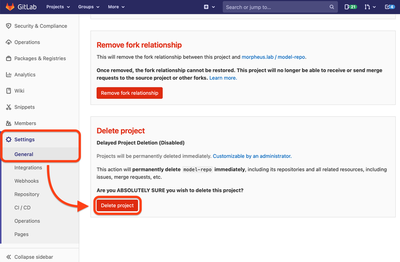
Then go to ‘Settings’ → ‘General’ in the navigation on the left, scroll all the way down to ‘Advanced’, click on ‘Expand’ and then on ‘Delete project’. Follow the instructions to finally delete your fork.
Now go back to the Morpheus Model Repository and fork as described above.
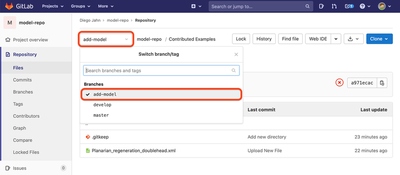
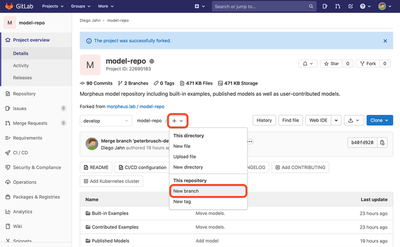
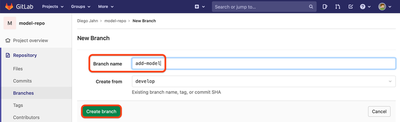
- Create a new branch by selecting ‘+’ → ‘New branch’, give the branch a name such as ‘add-model’, keep the option ‘Create from’ set to
masterand finish with ‘Create branch’.
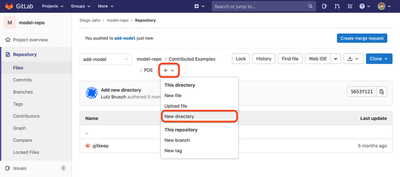
- Now browse to the model category and a topic area to which you want to contribute (you can also suggest a new one if you think that a suitable topic is still missing) and create a new directory for your model by clicking ‘+’ → ‘New directory’.

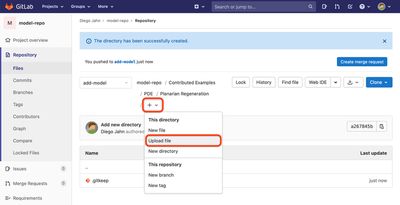
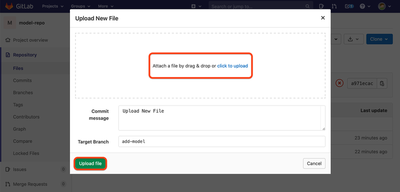
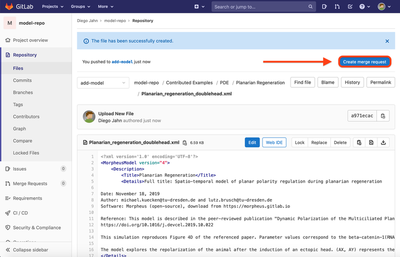
- Click the ‘+’ button again and then ‘New file’ to paste your model from the clipboard or ‘Upload file’ to choose a XML file on your computer. This will open a simple form. Fill in/upload the model and click ‘Commit changes’ or ‘Upload file’. You may but do not need to add text in the comments field (‘commit message’).
-
Optional: You may add an
index.mdfile for an extended explanation of your model, similar to the built-in models. -
When you are finished adding files and folders, click on ‘Create merge request’ in the top right corner.
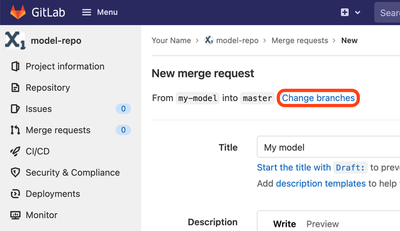
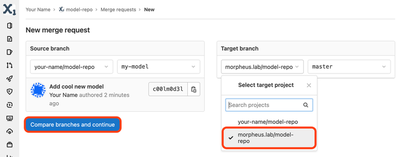
Go to ‘Change branches’ and switch the target project in the right column from your fork to the project ‘morpheus.lab/model-repo’. Keep the target branch to the right of it as it is, set to ‘master’. When finished, click on ‘Compare branches and continue’.
If you like, change the title and description of your submission, check the box ‘Contribution’ (please keep all ‘Merge options’ checked) and submit your model files by clicking on ‘Submit merge request’.
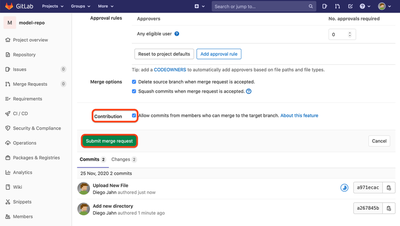
Explanation for the ‘Merge options’:
- ‘Delete source branch when merge request is accepted’: This option only means that after the successful publication of your model on the website, the system automatically cleans up by deleting your old branch. This old branch, however, represents only a copy of your submission at this point, since your model is now also located in the
masterbranch and hence published on the Morpheus website. So no information is lost here on deletion. - ‘Squash commits when merge request is accepted’: This means that all small adjustments made by you and the curators during the review process are combined into a single change in the version history when your model is accepted (merged). Your initial commit (the first edit made when you created your new model), including your name, will always remain visible to all in the repository’s history.
- Now the review process starts. In the meantime you can make further changes to your model and, if created, to the
index.mddescription page at any time.
Don’t forget to work within your newly created branch for the new model so that your changes are mirrored in the open merge request.